Knowledgebase | Jason Morrell
The Complete Guide to Adding Watermarks in Microsoft Word
Use the watermark feature to add text watermarks or image watermarks to your document. Did you know you can also use headers and footers to do it?


A Microsoft Word watermark is an image or item of text that appears in the background on every page, behind the text, and often full-page height.
In the old days, you could buy watermarked paper from a stationer. The watermark was often an indication of status, e.g. Basildon Bond is a high-quality brand of stationery.
You can create a pre-designed document background watermark with a single click, and a custom watermark with just a little more effort. You can use text or images as a watermark.
This watermark tutorial covers both basic and advanced techniques for Microsoft Word users.
1. Standard watermarks
Add a predesigned text watermark in Microsoft Word
1Select the Design tab to access Word’s watermark design features.
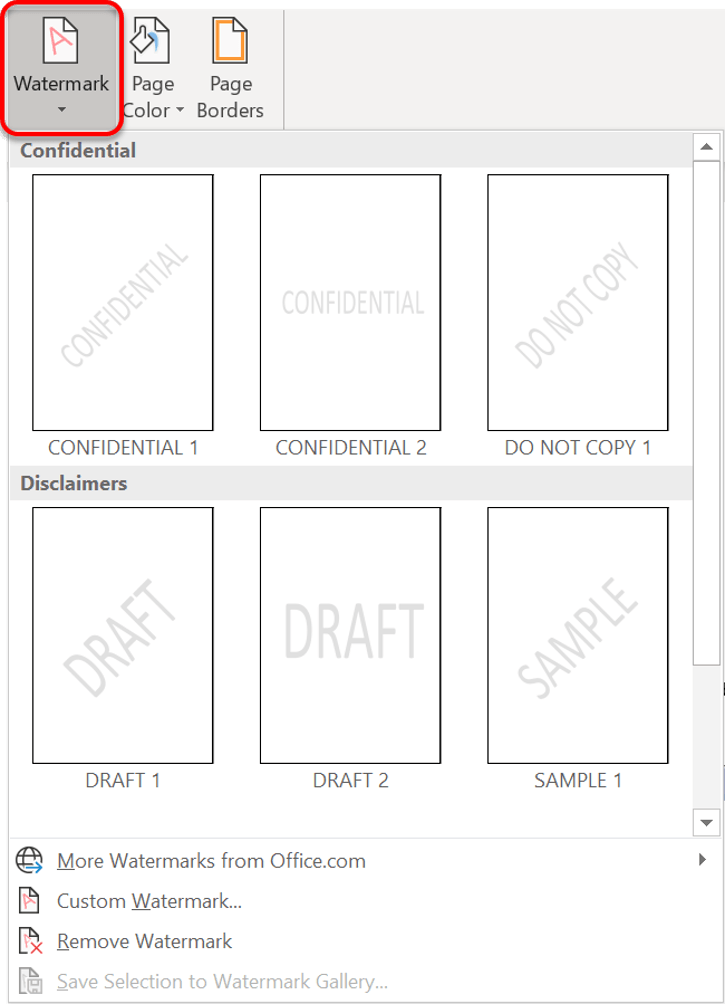
2Click the Watermark icon in the Page Background group to access all watermark options.
3Choose one of the pre-set designs in the gallery. The watermark is added instantly to the pages in the current document.

2. Custom text watermarks
Create a custom watermark using text
1Select the Design tab.
2Click the Watermark icon in the Page Background group.
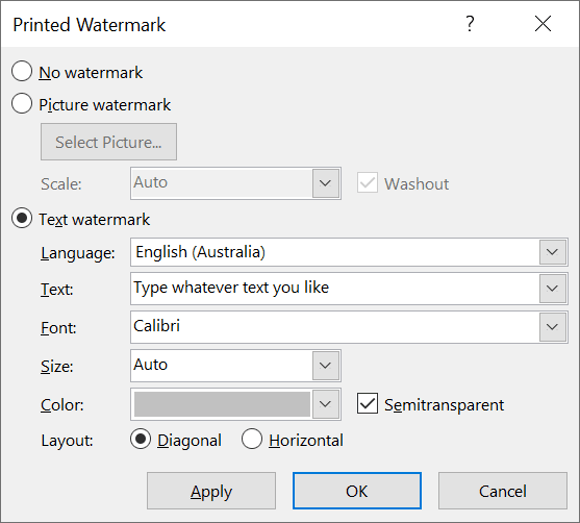
3Choose Custom Watermark.. The Printed Watermark dialog box is displayed.
4Choose the Text Watermark option.
5Enter your watermark text in the Text box, and choose the font, size, colour and direction of the text. Leave the Semitransparent tick box ticked.
This custom watermark approach gives you complete control over appearance and positioning.

3. Custom image watermarks
Create a picture watermark using your own image
1Select the Design tab.
2Click the Watermark icon in the Page Background group.
3Choose Custom Watermark.. The Printed Watermark dialog box is displayed.
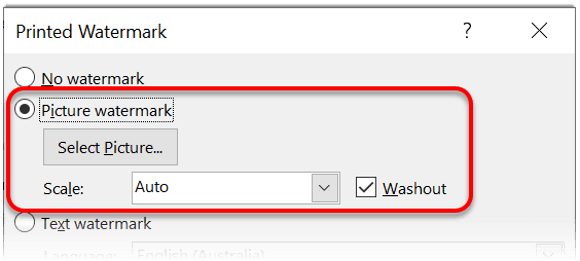
4Choose the Picture Watermark option to add your custom image watermark.

5Click the Select Picture..button.
6Locate and select your image.
7Tick the Washout box, if you want.
8Choose a Scale option to resize the image if you want.
9Click OK
Edit your Microsoft Word watermark image or text
1Double-click inside the header or footer area.
2Select the Design tab under the Header & Footer Tools banner, if necessary.
3Untick the Show Document Text option in the Options group.
4The watermark image or text (WordArt) can now be selected, resized or manipulated in any way you want.
5Click the Close Header and Footer icon in the Close group.
Remove a watermark from your document
1Select the Page Layout tab.
2Click the Watermark icon in the Page Background group.
3Choose Remove Watermark to delete the watermark completely.
4. Add a side banner on your pages
Beyond traditional watermarks, Word’s design features offer creative alternatives for document backgrounds.
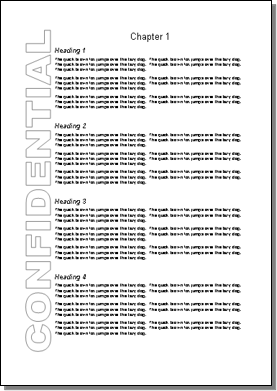
Sometimes, rather than a traditional watermark, you may wish to add a banner down one side of the document as an alternative Word formatting technique, on every page. The technique is similar to adding a watermark, but everything is done through the header and footer.
1Double-click inside the header area of the page (the top margin area).
2Select the Design tab under the Header & Footer Tools banner, if necessary.
3Untick the Show Document Text option in the Options group.
4Insert a WordArt with the required text.
5Rotate the text 90 degrees to display it vertically.
6Stretch the WordArt image to full page height and position to the left, or the right side of the page.
7Using the WordArt tools, set the Word Wrapping to Square. This prevents the document text from overlapping the WordArt text.
8Click the Close Header and Footer icon in the Close group.

5. What next?
Here are some other advanced Microsoft Word text effects and formatting you may be interested in.

Jason Morrell is a professional course creator, consultant and trainer. He's the guy that people often sneak through the back door to fix up a hot mess that has defeated everybody. He takes on client projects and helps people of all levels unleash the power contained within Microsoft 365, simplifying tricky concepts and providing helpful, proven, actionable advice.
In his downtime he loves to shoot into the Gold Coast Hinterland on his Indian motorcycle and tend to his 47 pets (they all live in an aviary).
If you would like some 1-on-1 time with Jason to finally get that project finished - you know the one - then please reach out.


