Knowledgebase | Jason Morrell
How to Create & Manipulate Simple Tables in Word
Tables in Word are useful in so many situations. In this post you’ll discover how to create tables, then manipulate and design them in the quickest and easiest way to provide that visual punch. Related Post: Enhance your Word tables with these advanced features 1. What are tables in Word good for? Tables are useful…
")

- 1. What are tables in Word good for?
- 2. How to create tables in Word
- 3. Moving around a Word table
- 4. Selecting a cell, row, column or the entire table
- 5. Inserting an extra row or column
- 6. Deleting a row or column
- 7. Quickly formatting tables in Word
- 8. Setting the borders and shading
- 9. Repeating table headings on every page when printing
- 10. All the key points again
Tables in Word are useful in so many situations. In this post you’ll discover how to create tables, then manipulate and design them in the quickest and easiest way to provide that visual punch.
Related Post: Enhance your Word tables with these advanced features
1. What are tables in Word good for?
Tables are useful for 2 distinct reasons.
- To show an actual table of data, or
- To organise and postion text, images and other elements on the page.
Many years ago, typewriters ruled the world. And a feature of a good typewriter was the tab stop, which was a device that essentially let you control indentation.
Over the years many people have continued to use tabs to indent text, because of its convenience, but they are hard work to set up properly.
Tables provide a much easier way to organise content on a page.
2. How to create tables in Word
1Select the Insert tab.
2Click the Tables icon in the Tables group.
3Move your mouse pointer into the table grid until the required number of rows and columns are highlighted orange, then left-click.
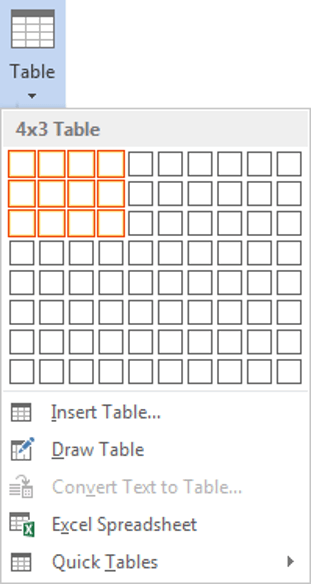
An empty table is inserted into the document.
Two new tabs, Design and Layout are also added to the ribbon area, under the banner of Table Tools.


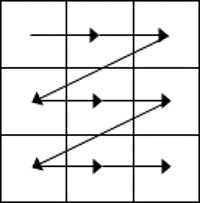
3. Moving around a Word table
- While the table is empty, you can use the cursor keys to move around the cells. However, when the cells contain information, using the cursor keys will move through the cell content first before moving to the next cell
- You can left-click in any cell to position the cursor.
- Press Tab to move to the next cell. The cursor will move across and then down the table.
- Press Shift + Tab to move to the previous cell.
NB. Using Tab is better than using the cursors as it will move to the next/previous cell regardless of whether there is information in the cells.
NB2. If you press Tab while you are in the last cell, a new row will be added to the bottom of your table
4. Selecting a cell, row, column or the entire table
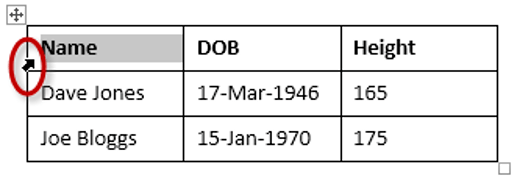
To select a cell:
1Position the mouse pointer inside the cell on the bottom-left corner of the cell. The pointer will change shape to a solid black arrow that points up and right.
2Left-click.
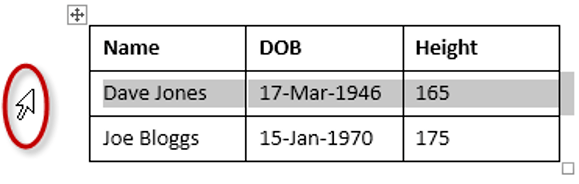
To select a row of a table:
1Position the mouse pointer in the left margin in line with the row you want to select. The mouse pointer will change to a white arrow that points up and right.
2Left-click.
To select a column
1Position the mouse pointer so that it rests on the top border of the table, above the column you want to select. The mouse pointer will change to a solid black arrow pointing down.
2Left-click.

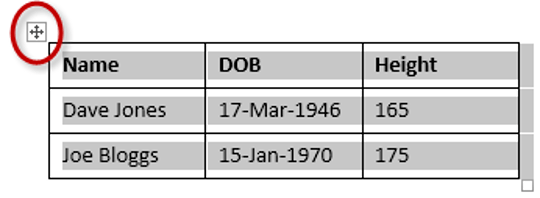
To select the entire table:
1Position your mouse pointer over the 4-headed arrow icon situated at the top-left of the table.
2Left-click.
5. Inserting an extra row or column
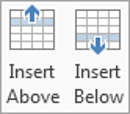
To insert an extra row:
1Position the cursor in a cell.
2Select the Layout tab, under the Table Tools banner.
3Click Insert Above or Insert Below in the Rows and Columns group
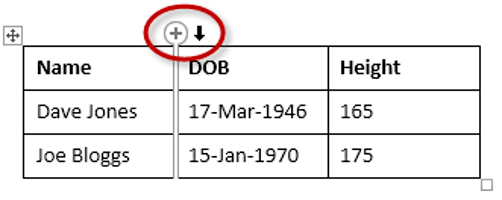
Here is a quick way to insert new rows:
1Position the cursor to the left of the table, but in close proximity.
2A plus symbol will appear above or below the mouse pointer indicating where the new row will be added.
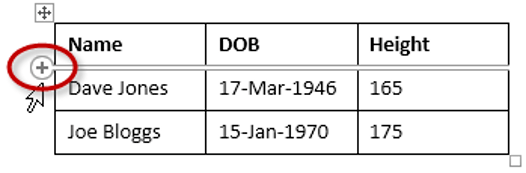
3Nudge the mouse pointer up or down to move the plus sign above or below.
4Left-click to insert the new row,
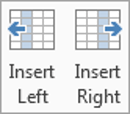
To insert an extra column:
1Position the cursor in a cell.
2Select the Layout tab, under the Table Tools banner.
3Click Insert Left or Insert Right in the Rows and Columns group
Here is a quick way to insert a new column:
1Position the cursor above a column, but in close proximity to the table.
2A plus symbol will appear to the left or right of the mouse pointer indicating where the new column will be added.
3Nudge the mouse pointer left or right to move the plus sign to the left or the right of the column.
4Left-click to insert the new column,
6. Deleting a row or column
To delete the current row or column:
1Position the cursor in any cell of the row you want to delete.
2Select the Layout tab, under the Table Tools banner.
3Click the Delete icon in the Rows and Columns group.
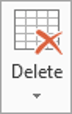
4Choose Delete Row or Delete Column from the drop-down menu.
7. Quickly formatting tables in Word
Word provides you with a number of pre-set table designs. This means that it formats the headings and the data, applies a variety of borders and colours the cells in a way that makes it look like a professionally produced table. As a beginner this simple technique will give you a good-looking table.
1Position the cursor in any cell in the table.
2Select the Design tab under the Table Tools banner.
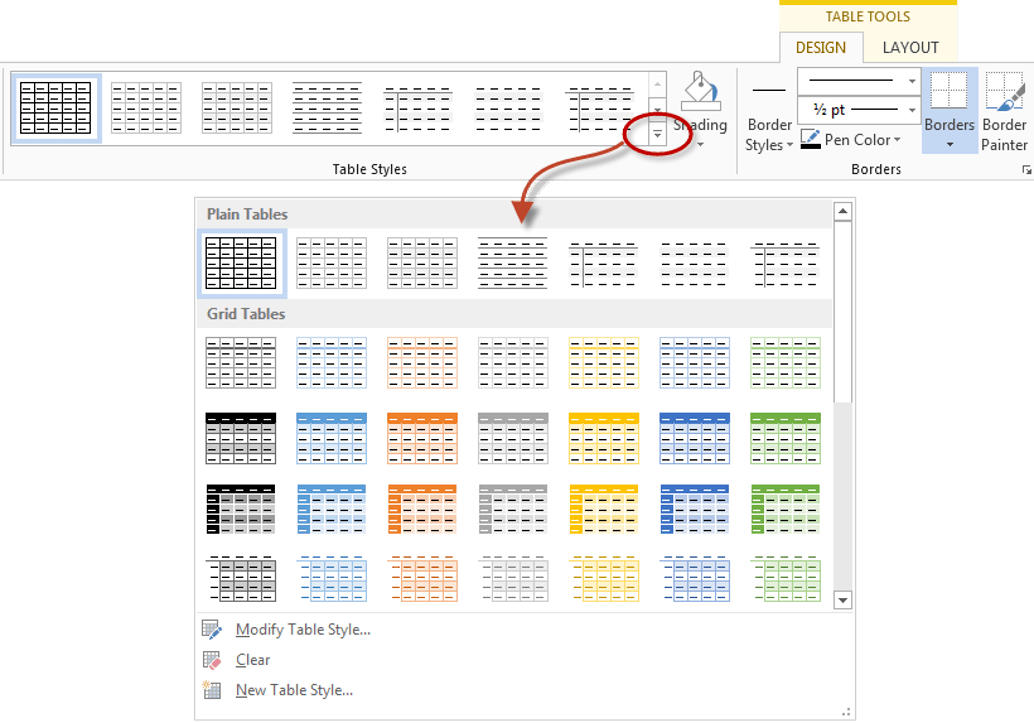
The Table Styles group lists a number of table designs. To get the full list, click the More buttonbeneath the table styles scroll bar
The default table style is Table Grid in the Plain Tables category which adds simple gridlines but no shading to your table.
Live Preview allows you to hover over a design and see it applied to your table. If you like what you see, click to select the table design.
In the Table Style Options group of the Design tab, tick the components that you have in your table. For example, if your table has column headings, tick Header Row. In doing this, the various parts of your table are formatted accordingly
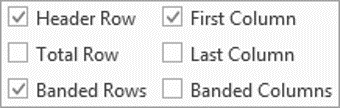
Header RowThis will emphasise the header row by making the text bold or applying a different cell colour (depending on the table style selected.
Total RowThis will emphasise the bottom table row by making the text bold or applying a different cell colour (depending on the table style selected.
First ColumnThis will emphasise the first column (for labels etc.) by making the text bold or applying a different cell colour (depending on the table style selected.
Last ColumnThis will emphasise the last column (for row totals etc.) by making the text bold or applying a different cell colour (depending on the table style selected.
Banded RowsThis will make odd rows one colour and even rows a different colour. This helps readability.
Banded ColumnsThis will make odd columns one colour and even columns a different colour. This helps readability.
8. Setting the borders and shading
The Table Styles Gallery allows you to completely format a table with one click. Whereas you used to need some nous, anybody can now create a professional looking design.
However, you will often still need to apply your own border and shading, and manually change a table design. With a little effort can add a lot of flavour to your page and dramatically enhance the overall appearance of the document.
To set the borders for tables in Word:
1Select the portion of the table that you wish to set the borders for. This may be the entire table, a row or rows, a column or columns or a selection of cells.
2Select the Design tab under the Table Tools banner.
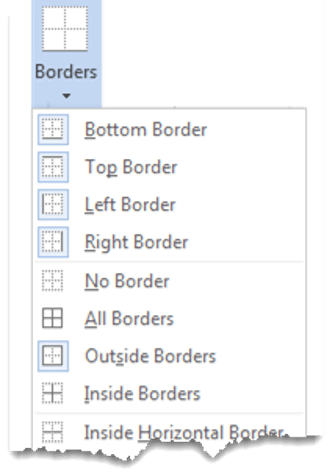
3Select the Borders icon. A drop-down list appears. This list shows every combination of border that can be turned on or off. The icons with a shaded background are currently switched on. The rest are switched off.
4Click any icon to switch the border on or off. The border style that is applied is the default style (½ pt solid black line ) or the last style that was used.
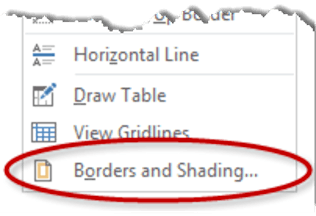
5To apply customised borders, with different colours, styles and widths, click the Borders & Shading option at the bottom of the list to display the Borders and Shading dialog box.
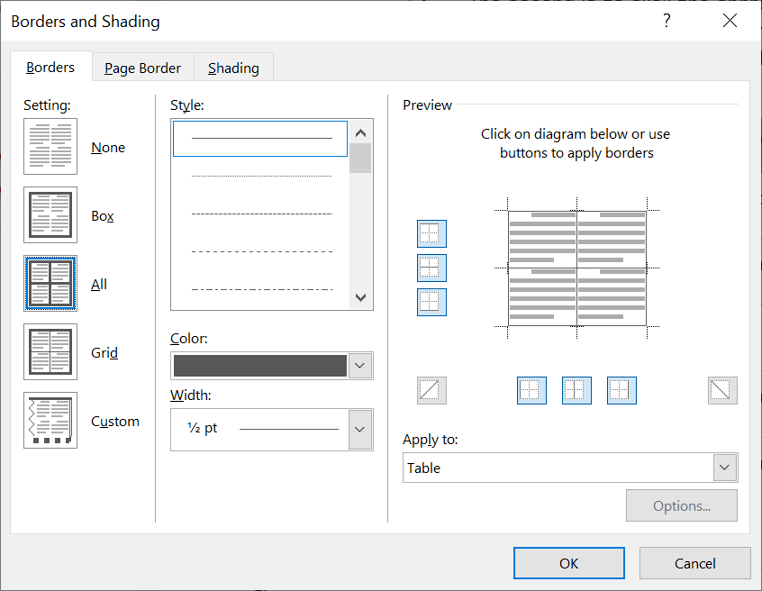
Your selection will always have an outer border, and if you selected more than one cell, you will have some inside borders as well. The easiest way to use the dialog box is to start on the bottom-middle and work your way up and right.
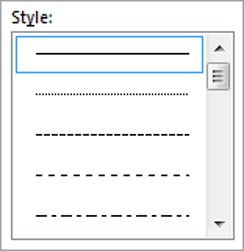
1Select the colour and width (thickness) that you would like for your border.
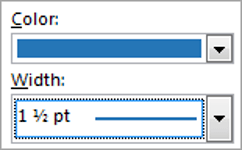
2Choose a style (e.g. dotted, dashed, double, solid etc.)
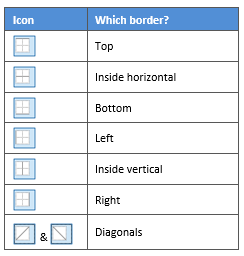
3Paint your borders. There are two ways to do this.
- The first way is to click directly on a border in the Preview itself.
- The second way is to click the appropriate icon around the edge of the Preview section that represents each border. Depending on which cells you selected in your table, some of these icons may not be available.
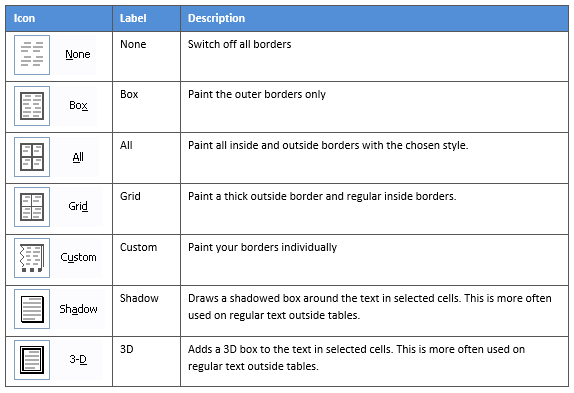
On the left-hand side of the dialog box, there are some pre-defined border combinations which you can use to save yourself some time. Depending on your selection of cells, the pre-defined options may differ. Here’s a run-down:
To shade the cells of tables in Word:
1Select the portion of the table that you wish to shade. This may be the entire table, a row or rows, a column or columns or a selection of cells.
2Select the Design tab under the Table Tools banner.
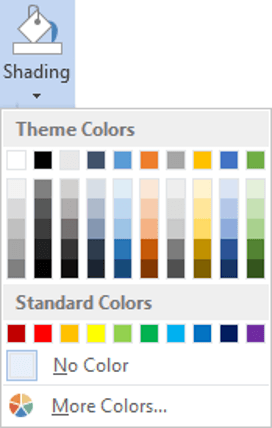
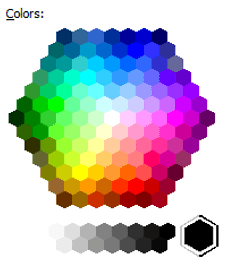
3Click the Shading icon.The colours that you see displayed match the current them of the document. Themes were discussed earlier in the course.
4Click a colour in the palette.
While you can pick any colour, it is recommended to stick with the light colour shades, otherwise your tables will appear very loud and ugly, like they’re shouting in your face. Subtle is the order of the day. The exception to this is column headings or other cells that you wish to differentiate. Under these circumstances, you can use a dark colour, but use a light font with it.
If you cannot find the exact colour you need,
- Click the More Colours link underneath the palette. This displays a larger, more accurate colour palette.
- And if that’s not enough, click the Custom tab and you’ll get a really fine selection of colours (you can even enter your own RGB settings if you know them)
9. Repeating table headings on every page when printing
When you have large tables that occupy two or more pages, many people insert manual page breaks, then copy and paste their table header rows at the top of each page.
When rows are added or removed from tables in Word, the table headers end up half way down the page.
There is a simple tool that will eliminate this problem
1Ensure that the table is a single table, with no manual page breaks in the middle, and one header at the top. The table header may occupy more than one row, it doesn’t affect the way this feature works.
2Position the cursor somewhere in the top row of the table.
3Select the Layout tab under the Table Tools banner.
4Click the Repeat Header Rows icon ion the Data group.
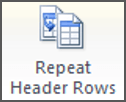
Now, it doesn’t matter how many rows tables in Word contain, if the table ever spills across into another page, the header row (which normally displays the column headings) will always appear at the top of the table.
10. All the key points again
- Tables in Word serve 2 distinct purpose: to display a table of data and to organise and position items on the page
- To create table, select 2 tabs – Design and Layout under the Table Tools banner.
- There are 2 tabs – Design and Layout under the Table Tools banner.
- You can press the TAB key to move direct to the next cell and SHIFT and TAB together to move backwards through a table.
- The four elements of a table are cells, rows, columns and the whole table. Each can be selected.
- Rows can be inserted by selecting the Layout tab under Table Tools, then clicking the Insert Above or Insert Below icons. Alternatively, hover to the left of a row and click the plus symbol that appears above or below the mouse pointer.
- Columns can be inserted by selecting the Layout tab under Table Tools, then clicking the InsertLeft or Insert Right icons. Alternatively, hover above a table column and click the plus symbol that appears to the left or right of the mouse pointer.
- Columns and rows and be removed from the table, by positioning the cursor in the row or column to be removed, then clicking the Delete icon on the Layout tab of Table Tools and choosing DeleteRow or Delete Column.
- Tables can be formatted using the Table Style gallery or by manually setting the shading and borders manually. Both sets of tools are found on the Design ribbon of the Table Tools.
- When using the Microsoft Table Styles, you can control the behaviour of the formatting by setting the Table Style options – 6 tick boxes that define the structure of your table.
- For long tables that spill across onto subsequent pages, the top row, which normally contains the column headings can be set to repeat automatically. So there is no excuse for cutting and pasting headings midway through your table or taping pages together to make sense of the table!
Jason Morrell is a professional course creator, consultant and trainer. He's the guy that people often sneak through the back door to fix up a hot mess that has defeated everybody. He takes on client projects and helps people of all levels unleash the power contained within Microsoft 365, simplifying tricky concepts and providing helpful, proven, actionable advice.
In his downtime he loves to shoot into the Gold Coast Hinterland on his Indian motorcycle and tend to his 47 pets (they all live in an aviary).
If you would like some 1-on-1 time with Jason to finally get that project finished - you know the one - then please reach out.
